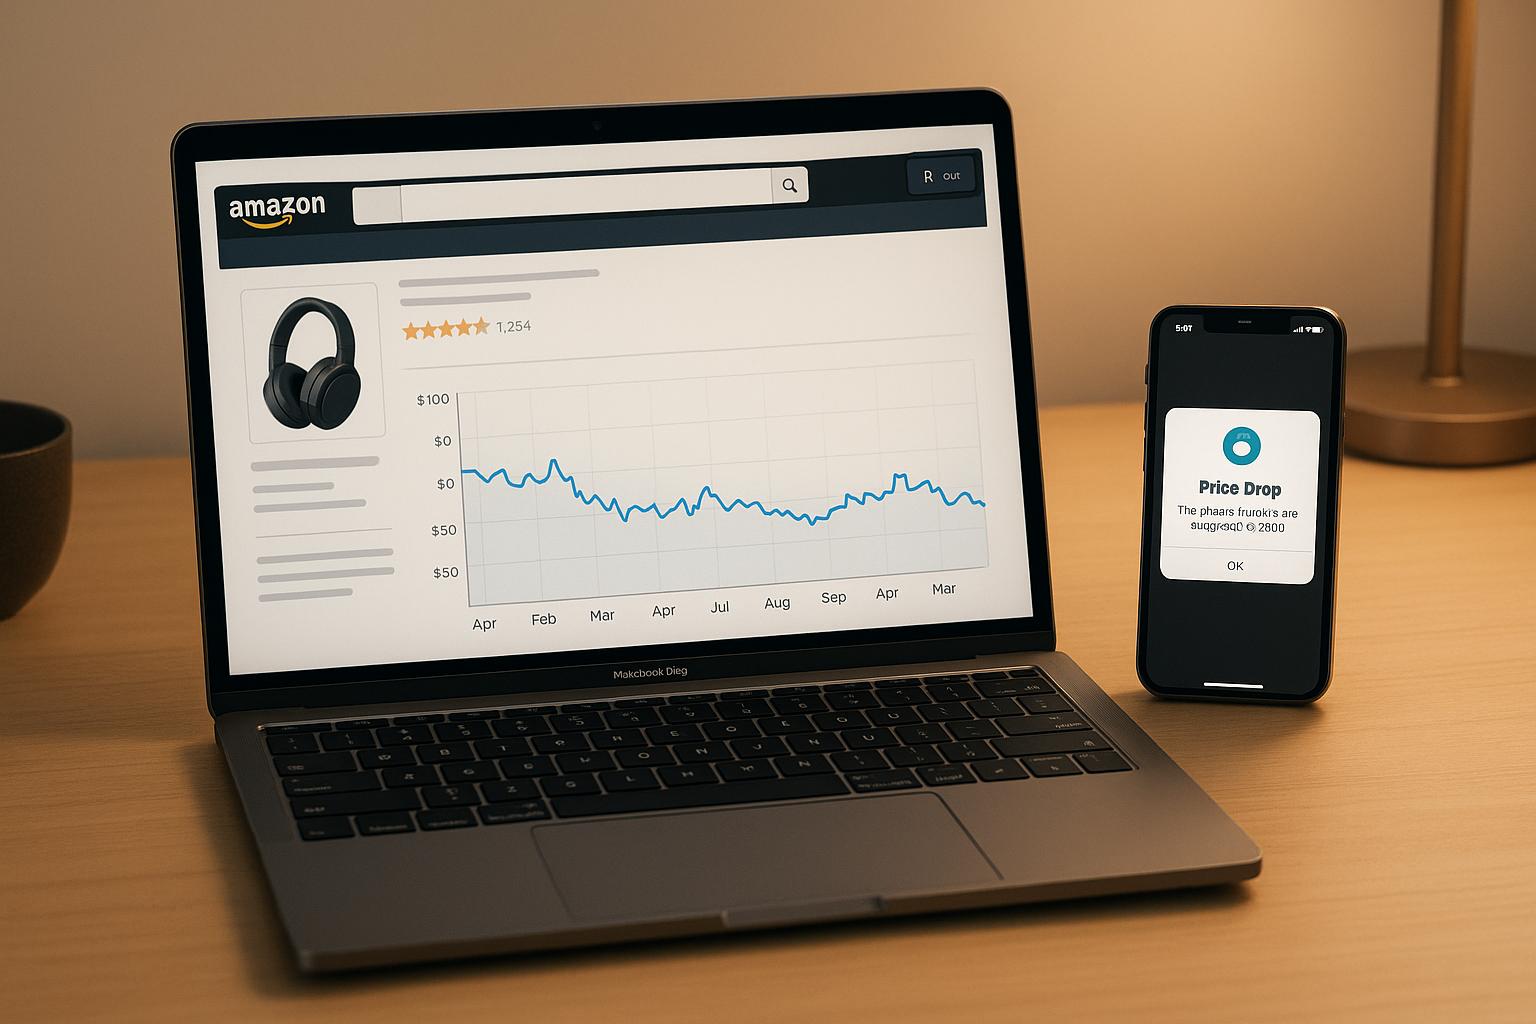
Creating an Amazon Price drop detector with Canopy
Learn how to build an Amazon price drop detector using the Canopy API for automated tracking, alerts, and historical price analysis.
Creating an Amazon Price drop detector with Canopy
Building an Amazon price drop detector is easier than you might think. With the Canopy API, you can automate price tracking, monitor historical trends, and even set up instant alerts for price drops - all without worrying about parsing HTML or dealing with IP blocks. Here's a quick breakdown of the process:
- Authenticate: Use OAuth2 to securely access the Canopy API with a client ID and secret.
- Fetch Product Data: Retrieve accurate pricing, ratings, and stock details using REST or GraphQL endpoints.
- Track Price History: Store historical pricing in a database to identify trends and drops.
- Detect Price Changes: Compare current and past prices to highlight meaningful savings.
- Send Alerts: Notify users via email or SMS when significant price drops occur.
The Canopy API simplifies the technical challenges of working with Amazon data, providing structured JSON responses and support for multiple international marketplaces. Whether you're a shopper or a developer, this guide covers everything you need to start monitoring prices effectively.
Build an Amazon Price Drop Tracker – Get Alerts with Keepa + Telegram
Setting Up Canopy API Access
Getting started with the Canopy API involves creating an account and setting up authentication to ensure smooth access.
Create an Account and Get Your API Key
Head over to canopyapi.co and sign up for an account. They offer a free Hobby plan with 100 requests per month, which is a great way to test the price drop detector before committing to a larger plan.
Once your account is set up, you'll need to generate API credentials. The Canopy API uses OAuth2 client credentials, which are perfect for automated tools like price monitors since they don’t require user interaction.
To create your credentials, log in to your Canopy dashboard and go to the Organization page. Under the Authentication tab, create a new set of Client Credentials. You’ll receive two key pieces of information:
- Client ID: A public identifier for your app.
- Client Secret: A private key that must remain confidential.
Keep these credentials secure - never expose them in client-side code or public repositories. If you rotate or delete them, it will impact all users and apps tied to your organization.
How to Authenticate API Requests
The Canopy API uses a two-step process for authentication. First, you exchange your client credentials for a temporary access token. Then, you include that token in your API requests.
Here’s how to generate an access token using JavaScript:
async function getAccessToken() {
  const response = await fetch('https://auth.canopy.umbra.space/oauth/token', {
    method: 'POST',
    headers: {
      'Content-Type': 'application/json'
    },
    body: JSON.stringify({
      client_id: 'YOUR_CLIENT_ID',
      client_secret: 'YOUR_CLIENT_SECRET',
      audience: 'https://api.canopy.umbra.space',
      grant_type: 'client_credentials'
    })
  });

  const data = await response.json();
  return data.access_token;
}
The response will include:
- access_token: The temporary token used for API requests.
- expires_in: The token's validity period in seconds.
- token_type: Always "Bearer" for the Canopy API.
Once you have the token, include it in the Authorization header for all API requests, like this:
async function getProductData(asin) {
  const accessToken = await getAccessToken();

  const response = await fetch(`https://rest.canopyapi.co/api/amazon/product?asin=${asin}`, {
    headers: {
      'Authorization': `Bearer ${accessToken}`
    }
  });

  return response.json();
}
Key token management tips:
- Access tokens have an expiration time, so avoid requesting a new token for every API call. Instead, cache and reuse tokens until they expire.
- Limit token requests to 50 per day to encourage caching.
- Handle 401 Unauthorized errors by requesting a new token and retrying the failed request.
- Consider refreshing tokens proactively to avoid disruptions in your price monitoring.
If you're using the developer sandbox for testing, adjust the audience parameter to https://api.canopy.prod.umbra-sandbox.space when generating your access token.
With authentication set up, you're ready to start retrieving Amazon product data and monitoring prices effectively.
Getting Amazon Product Data
Once you've authenticated, the next step is to pull Amazon product data to fuel your price drop detector. The Canopy API offers detailed product information through both REST and GraphQL endpoints, giving you flexibility in how you make your requests.
How to Fetch Product Details
To access product details, you'll need the product's ASIN (Amazon Standard Identification Number), which is unique to every product. You can find the ASIN in the product URL or on the product page.
Here’s an example of retrieving product details using the REST API:
async function getProductDetails(asin) {
  const accessToken = await getAccessToken();

  const response = await fetch(`https://rest.canopyapi.co/api/amazon/product?asin=${asin}&domain=US`, {
    headers: {
      'Authorization': `Bearer ${accessToken}`
    }
  });

  const data = await response.json();
  return data.data.amazonProduct;
}

// Example usage
const product = await getProductDetails('B01HY0JA3G');
console.log(product.title, product.price.display);
If you have the full Amazon URL instead of just the ASIN, you can still fetch the product details:
async function getProductByUrl(amazonUrl) {
  const accessToken = await getAccessToken();

  const response = await fetch(`https://rest.canopyapi.co/api/amazon/product?url=${encodeURIComponent(amazonUrl)}&domain=US`, {
    headers: {
      'Authorization': `Bearer ${accessToken}`
    }
  });

  return response.json();
}
The API provides detailed fields such as title, price, asin, url, rating, ratingsTotal, isPrime, isNew, and mainImageUrl. The price object includes both a numeric value and a formatted display string, making it simple to track and present price changes.
For more flexibility, you can use the GraphQL endpoint to tailor your queries:
async function getProductWithGraphQL(asin) {
  const accessToken = await getAccessToken();

  const query = `
    query GetProduct($asin: String!) {
      amazonProduct(input: { asinLookup: { asin: $asin, domain: US } }) {
        title
        asin
        url
        price {
          value
          currency
          display
          symbol
        }
        rating
        ratingsTotal
        isPrime
        mainImageUrl
        seller {
          name
          sellerId
        }
      }
    }
  `;

  const response = await fetch('https://graphql.canopyapi.co/', {
    method: 'POST',
    headers: {
      'Authorization': `Bearer ${accessToken}`,
      'Content-Type': 'application/json'
    },
    body: JSON.stringify({
      query: query,
      variables: { asin: asin }
    })
  });

  return response.json();
}
Working with U.S. Data Formats
When working with Amazon.com data, ensure you're using U.S. formats for pricing and ratings. The API conveniently returns data in these formats.
For pricing, the API includes both a numeric value (ideal for calculations) and a formatted display string (perfect for user-facing applications):
const product = await getProductDetails('B08N5WRWNW');

// Numeric value for calculations
const numericPrice = product.price.value; // 299.99

// Formatted price for display
const formattedPrice = product.price.display; // "$299.99"

// Currency details
const currency = product.price.currency; // "USD"
const symbol = product.price.symbol; // "$"
When tracking price history, use the numeric value field for comparisons and calculations, and save the display field for showing users how the price appeared on Amazon at the time.
The API also accounts for edge cases, such as when a product is temporarily unavailable. In these cases, the price field may return null, so your logic should handle this gracefully:
function trackPriceChange(currentProduct, previousProduct) {
  // Handle cases where price might be unavailable
  if (!currentProduct.price || !previousProduct.price) {
    return null;
  }

  const currentPrice = currentProduct.price.value;
  const previousPrice = previousProduct.price.value;

  if (currentPrice < previousPrice) {
    const savings = previousPrice - currentPrice;
    const percentageOff = ((savings / previousPrice) * 100).toFixed(1);

    return {
      priceDropped: true,
      savings: savings,
      percentageOff: percentageOff,
      newPrice: currentProduct.price.display,
      oldPrice: previousProduct.price.display
    };
  }

  return { priceDropped: false };
}
Ratings are also returned in U.S. formats, with decimal numbers for ratings (e.g., 4.3 out of 5 stars) and comma-separated counts for large numbers (e.g., "1,247 ratings"). This ensures the data is ready to use without additional formatting.
Monitoring and Detecting Price Changes
This step uses the previously stored price history to identify actionable price drops. By continuously monitoring and employing smart comparison techniques, it becomes possible to highlight meaningful price reductions while ignoring minor fluctuations.
Tracking Price History
The backbone of price monitoring lies in maintaining a detailed database of historical price data. A structured database can track prices over time, and a polling system ensures regular updates.
Here’s an example of how you might structure such a database:
// Example SQL database schema
const priceHistory = {
  id: 'auto_increment',
  asin: 'string',
  price: 'decimal',
  currency: 'string',
  display_price: 'string',
  timestamp: 'datetime',
  in_stock: 'boolean'
};

async function savePriceHistory(asin, productData) {
  const priceRecord = {
    asin: asin,
    price: productData.price ? productData.price.value : null,
    currency: productData.price ? productData.price.currency : null,
    display_price: productData.price ? productData.price.display : null,
    timestamp: new Date(),
    in_stock: productData.price !== null
  };

  // Save the record to the database
  await database.insert('price_history', priceRecord);
  return priceRecord;
}
For effective monitoring, set up a schedule to check product prices periodically. Depending on your needs and API limits, this could range from every 15 minutes to once an hour for active products.
class PriceMonitor {
  constructor() {
    this.monitoredProducts = new Map();
    this.isRunning = false;
  }

  addProduct(asin, checkInterval = 30 * 60 * 1000) { // Default: 30 minutes
    this.monitoredProducts.set(asin, {
      asin: asin,
      interval: checkInterval,
      lastChecked: null,
      callbacks: []
    });
  }

  async startMonitoring() {
    this.isRunning = true;

    while (this.isRunning) {
      const now = Date.now();

      for (const [asin, config] of this.monitoredProducts) {
        const timeSinceLastCheck = now - (config.lastChecked || 0);

        if (timeSinceLastCheck >= config.interval) {
          try {
            await this.checkProduct(asin);
            config.lastChecked = now;
          } catch (error) {
            console.error(`Error checking ${asin}:`, error);
          }
        }
      }

      // Pause for 60 seconds before the next iteration
      await new Promise(resolve => setTimeout(resolve, 60000));
    }
  }

  async checkProduct(asin) {
    const currentProduct = await getProductDetails(asin);
    const previousPrice = await this.getLastPrice(asin);

    // Save the current price to the database
    await savePriceHistory(asin, currentProduct);

    // Check for price changes
    if (previousPrice && currentProduct.price) {
      const priceChange = this.detectPriceChange(currentProduct, previousPrice);

      if (priceChange.priceDropped) {
        await this.handlePriceDrop(asin, priceChange);
      }
    }
  }

  async getLastPrice(asin) {
    // Retrieve the most recent price from the database
    const lastRecord = await database.query(
      'SELECT * FROM price_history WHERE asin = ? ORDER BY timestamp DESC LIMIT 1',
      [asin]
    );

    return lastRecord ? {
      price: { value: lastRecord.price, display: lastRecord.display_price }
    } : null;
  }

  detectPriceChange(currentProduct, previousProduct, options = {}) {
    const {
      minimumDollarDrop = 1.00,        // Minimum $1 drop
      minimumPercentageDrop = 5.0,    // Minimum 5% drop
      ignoreSmallPrices = 10.00       // Ignore items priced under $10
    } = options;

    if (!currentProduct.price || !previousProduct.price) {
      return {
        priceDropped: false,
        reason: 'Price unavailable',
        currentPrice: currentProduct.price,
        previousPrice: previousProduct.price
      };
    }

    const currentPrice = currentProduct.price.value;
    const previousPrice = previousProduct.price.value;

    // Skip items with very low prices, as their pricing tends to fluctuate
    if (previousPrice < ignoreSmallPrices) {
      return { priceDropped: false, reason: 'Price below threshold' };
    }

    const dollarDrop = previousPrice - currentPrice;
    const percentageDrop = (dollarDrop / previousPrice) * 100;

    // Check if the price drop meets the criteria
    const significantDrop = dollarDrop >= minimumDollarDrop &&
                            percentageDrop >= minimumPercentageDrop;

    if (significantDrop && currentPrice < previousPrice) {
      return {
        priceDropped: true,
        dollarDrop: Math.round(dollarDrop * 100) / 100,
        percentageDrop: Math.round(percentageDrop * 10) / 10,
        newPrice: currentProduct.price.display,
        oldPrice: previousProduct.price.display,
        savings: dollarDrop,
        timestamp: new Date()
      };
    }

    return {
      priceDropped: false,
      reason: 'Drop not significant enough',
      dollarDrop: dollarDrop,
      percentageDrop: percentageDrop
    };
  }

  async handlePriceDrop(asin, priceChange) {
    // Logic for handling price drops, such as sending notifications
    console.log(`Price drop detected for ${asin}:`, priceChange);
  }
}
How to Detect Price Drops
With the stored price history in place, you can now focus on identifying meaningful price changes. The detectPriceChange function outlined above helps filter out minor fluctuations and highlights significant drops. By setting thresholds - like a minimum dollar amount or percentage drop - you can ensure the system prioritizes genuine savings opportunities over temporary or negligible changes.
This approach ensures that your price monitoring system stays focused on identifying valuable deals without being distracted by small, irrelevant price shifts.
sbb-itb-d082ab0
Setting Up Price Drop Alerts
This section dives into how to notify users when a considerable price drop is detected. Using the handlePriceDrop function as the trigger, these alerts ensure users are promptly informed about deals they won't want to miss.
Setting Up Alert Workflows
To efficiently notify users, integrate messaging services that deliver clear, actionable alerts immediately after a price drop is identified. The workflow kicks off as soon as the handlePriceDrop function flags a significant price reduction.
For email and SMS alerts, consider using SendGrid and Twilio, respectively. Here's a step-by-step breakdown of how these can be implemented:
const sgMail = require('@sendgrid/mail');
sgMail.setApiKey(process.env.SENDGRID_API_KEY);

class AlertService {
  constructor() {
    this.subscribers = new Map(); // Tracks user alert preferences
  }

  async sendEmailAlert(userEmail, asin, priceChange, productDetails) {
    const formattedDate = new Date().toLocaleDateString('en-US', {
      weekday: 'long',
      year: 'numeric',
      month: 'long',
      day: 'numeric',
      hour: '2-digit',
      minute: '2-digit',
      timeZone: 'America/New_York'
    });

    const savingsAmount = new Intl.NumberFormat('en-US', {
      style: 'currency',
      currency: 'USD'
    }).format(priceChange.savings);

    const emailContent = {
      to: userEmail,
      from: 'alerts@yourapp.com',
      subject: `🔥 Price Drop Alert: Save ${savingsAmount} on ${productDetails.title}`,
      html: `
        <div style="font-family: Arial, sans-serif; max-width: 600px; margin: 0 auto;">
          <h2 style="color: #e47911;">Price Drop Detected!</h2>
          <div style="border: 1px solid #ddd; padding: 20px; border-radius: 8px; margin: 20px 0;">
            <h3 style="margin-top: 0;">${productDetails.title}</h3>
            <div style="display: flex; align-items: center; margin: 15px 0;">
              <img src="${productDetails.mainImageUrl}" alt="Product" style="width: 100px; height: 100px; object-fit: contain; margin-right: 20px;">
              <div>
                <p style="margin: 5px 0;"><strong>Previous Price:</strong> <span style="text-decoration: line-through; color: #999;">${priceChange.oldPrice}</span></p>
                <p style="margin: 5px 0;"><strong>New Price:</strong> <span style="color: #e47911; font-size: 1.2em; font-weight: bold;">${priceChange.newPrice}</span></p>
                <p style="margin: 5px 0;"><strong>You Save:</strong> <span style="color: #008a00; font-weight: bold;">${savingsAmount} (${priceChange.percentageDrop}%)</span></p>
              </div>
            </div>
            <div style="text-align: center; margin: 20px 0;">
              <a href="${productDetails.url}" style="background-color: #ff9900; color: white; padding: 12px 24px; text-decoration: none; border-radius: 4px; font-weight: bold;">View on Amazon</a>
            </div>
            <p style="font-size: 0.9em; color: #666; margin-top: 20px;">
              Alert sent on ${formattedDate}<br>
              ASIN: ${asin}
            </p>
          </div>
          <p style="font-size: 0.8em; color: #999;">
            You're receiving this because you subscribed to price alerts for this product.
            <a href="https://yourapp.com/unsubscribe?asin=${asin}&email=${userEmail}">Unsubscribe from this product</a>
          </p>
        </div>
      `
    };

    try {
      await sgMail.send(emailContent);
      console.log(`Email alert sent to ${userEmail} for ${asin}`);
      return true;
    } catch (error) {
      console.error('Failed to send email alert:', error);
      return false;
    }
  }

  async sendSMSAlert(phoneNumber, asin, priceChange, productDetails) {
    const twilio = require('twilio');
    const client = twilio(process.env.TWILIO_ACCOUNT_SID, process.env.TWILIO_AUTH_TOKEN);

    const savingsAmount = new Intl.NumberFormat('en-US', {
      style: 'currency',
      currency: 'USD'
    }).format(priceChange.savings);

    const message = `🔥 PRICE DROP: ${productDetails.title.substring(0, 50)}...
Was: ${priceChange.oldPrice}
Now: ${priceChange.newPrice}
Save: ${savingsAmount} (${priceChange.percentageDrop}%)
View: ${productDetails.url}`;

    try {
      await client.messages.create({
        body: message,
        from: process.env.TWILIO_PHONE_NUMBER,
        to: phoneNumber
      });
      console.log(`SMS alert sent to ${phoneNumber} for ${asin}`);
      return true;
    } catch (error) {
      console.error('Failed to send SMS alert:', error);
      return false;
    }
  }
}
With these workflows, users will be promptly notified of price drops through their preferred channels.
Timing Your Notifications
When you send alerts can be just as important as the alert itself. Timing plays a big role in ensuring users take action. Many U.S. shoppers are most active during weekday evenings and mid-day on weekends. Avoid sending alerts during late-night hours unless users have opted for instant notifications.
class SmartAlertScheduler {
  constructor() {
    this.alertQueue = [];
    this.userPreferences = new Map();
  }

  shouldSendImmediately(priceChange, userPreferences = {}) {
    const now = new Date();
    const hour = now.getHours();
    const dayOfWeek = now.getDay(); // 0 = Sunday, 6 = Saturday

    // High-value drops get immediate alerts regardless of time
    if (priceChange.savings >= 50.00 || priceChange.percentageDrop >= 30) {
      return true;
    }

    // Respect user's quiet hours (default: 11 PM to 7 AM)
    const quietStart = userPreferences.quietHoursStart || 23;
    const quietEnd = userPreferences.quietHoursEnd || 7;

    if (hour >= quietStart || hour < quietEnd) {
      return false; // Queue for later
    }

    // Send during peak shopping hours
    const isWeekend = dayOfWeek === 0 || dayOfWeek === 6;
    const isPeakHour = isWeekend
      ? (hour >= 10 && hour <= 16)
      : (hour >= 19 && hour <= 22);

    return isPeakHour;
  }

  async scheduleAlert(userEmail, asin, priceChange, productDetails) {
    const userPrefs = this.userPreferences.get(userEmail) || {};

    if (this.shouldSendImmediately(priceChange, userPrefs)) {
      await this.sendAlert(userEmail, asin, priceChange, productDetails);
    } else {
      // Queue for the next optimal time
      const nextSendTime = this.calculateNextOptimalTime(userPrefs);
      this.alertQueue.push({ userEmail, asin, priceChange, productDetails, sendTime: nextSendTime });
      console.log(`Alert for ${asin} queued to be sent at ${nextSendTime}`);
    }
  }

  calculateNextOptimalTime(userPreferences) {
    // Schedule the alert for one hour later
    const nextTime = new Date();
    nextTime.setHours(nextTime.getHours() + 1);
    return nextTime;
  }
}
Best Practices for Canopy API Usage
Creating a dependable price drop detector requires thoughtful design to prevent hitting rate limits and encountering failures.
Making Efficient API Requests
When you exceed request limits, you'll encounter an HTTP 429 error. Canopy API enforces rate limits on a rolling basis, with most endpoints allowing 25 read operations per second and 5 write operations per second. To stay within these limits, consider implementing request queuing, especially for endpoints with stricter limits. During periods of heavy traffic, reduce your polling frequency to avoid disruptions.
Here's an example of a client implementation that manages API requests intelligently:
class CanopyAPIClient {
  constructor(apiKey) {
    this.apiKey = apiKey;
    this.baseURL = 'https://rest.canopyapi.co';
    this.requestQueue = [];
    this.isProcessing = false;
  }

  async makeRequest(endpoint, params = {}) {
    return new Promise((resolve, reject) => {
      this.requestQueue.push({ endpoint, params, resolve, reject });
      this.processQueue();
    });
  }

  async processQueue() {
    if (this.isProcessing || this.requestQueue.length === 0) return;

    this.isProcessing = true;

    while (this.requestQueue.length > 0) {
      const { endpoint, params, resolve, reject } = this.requestQueue.shift();

      try {
        const response = await this.executeRequest(endpoint, params);
        resolve(response);

        // Limit requests to approximately 25 per second
        await this.delay(50);
      } catch (error) {
        if (error.status === 429) {
          // Apply exponential backoff with jitter
          const backoffTime = this.calculateBackoff() + Math.random() * 1000;
          console.log(`Rate limited. Retrying in ${backoffTime}ms`);
          await this.delay(backoffTime);
          this.requestQueue.unshift({ endpoint, params, resolve, reject });
        } else {
          reject(error);
        }
      }
    }

    this.isProcessing = false;
  }

  calculateBackoff(attempt = 1) {
    return Math.min(1000 * Math.pow(2, attempt), 30000); // Max 30 seconds
  }

  async executeRequest(endpoint, params) {
    const url = new URL(`${this.baseURL}${endpoint}`);
    Object.keys(params).forEach(key => {
      if (params[key] !== undefined) {
        url.searchParams.append(key, params[key]);
      }
    });

    const response = await fetch(url, {
      headers: {
        'API-KEY': this.apiKey,
        'Content-Type': 'application/json'
      }
    });

    if (!response.ok) {
      throw { status: response.status, message: await response.text() };
    }

    return response.json();
  }

  delay(ms) {
    return new Promise(resolve => setTimeout(resolve, ms));
  }
}
This approach helps you handle rate limits gracefully while ensuring efficient data retrieval.
Fixing Common Issues
Several issues, such as authentication errors or data inconsistencies, can interfere with your API's performance. To minimize disruptions, always validate your product data before processing it.
Here’s a utility class for handling errors and ensuring data quality:
class ErrorHandler {
  static handleAPIError(error, asin) {
    switch (error.status) {
      case 400:
        console.error(`Invalid request for ${asin}:`, error.message);
        break;
      case 404:
        console.warn(`Product ${asin} not found. It may be discontinued.`);
        break;
      case 429:
        console.log(`Rate limited for ${asin}. Implementing backoff.`);
        break;
      case 500:
        console.error(`Server error for ${asin}. Retrying later.`);
        break;
      default:
        console.error(`Unexpected error for ${asin}:`, error);
    }
  }

  static validateProductData(productData, asin) {
    const issues = [];

    if (!productData.price || !productData.price.value) {
      issues.push('Price data unavailable');
    }

    if (!productData.title) {
      issues.push('Product title missing');
    }

    if (productData.price && typeof productData.price.value !== 'number') {
      issues.push('Price format invalid');
    }

    if (issues.length > 0) {
      console.warn(`Data quality issues for ${asin}:`, issues);
      return false;
    }

    return true;
  }
}
This class ensures that you can respond appropriately to API errors and maintain clean, usable data.
REST vs. GraphQL for Price Monitoring
Selecting the right endpoint type is crucial for optimizing your price monitoring setup. Canopy API offers both REST and GraphQL endpoints, each with distinct strengths depending on your use case:
| Feature/Aspect | REST Endpoint | GraphQL Endpoint |
|---|---|---|
| Data Retrieval | Retrieves fixed structures, often requiring multiple requests for related data. | Custom queries fetch exactly the needed data in a single request. |
| Flexibility | Less flexible; the server defines the resources and their structure. | Highly flexible; the client dictates the structure of the response. |
| Efficiency for Price Monitoring | May require multiple calls to gather all desired product details. | Can fetch price, product details, and related information in one optimized query. |
| Complexity | Generally simpler to implement for basic operations. | Can involve a steeper learning curve for initial setup and query construction. |
| Over-fetching/Under-fetching | Prone to retrieving too much or too little data. | Designed to prevent over-fetching and under-fetching, leading to efficient data transfer. |
| Use Cases | Ideal for straightforward data access patterns requiring most of a resource's information. | Best for complex queries, mobile applications, or scenarios needing data aggregation. |
For basic price checks, the REST endpoint is straightforward and requires minimal setup, as shown below:
// REST approach - simple price check
const response = await canopyClient.makeRequest('/api/amazon/product', {
  asin: 'B01HY0JA3G',
  domain: 'US'
});
const currentPrice = response.data.amazonProduct.price.value;
On the other hand, if you need comprehensive product details - like reviews, variants, or historical data - GraphQL is a better choice. It consolidates all data retrieval into a single, efficient query.
Conclusion
Creating an Amazon price drop detector with the Canopy API involves five straightforward steps: securing API access, retrieving product data, monitoring prices, detecting drops, and setting up alerts to notify you immediately when prices fall. These steps summarize the detailed process outlined earlier.
As your system grows, you can rely on the Canopy API's ability to handle over 10,000 daily cache hits, ensuring consistent performance even with increased demand.
When working with U.S. standards, remember to format prices with dollar signs, use the MM/DD/YYYY format for dates, and apply comma separators for large numbers.
For basic price checks, REST is a simple option. On the other hand, GraphQL allows you to fetch comprehensive product details in a single request - an essential feature as your system becomes more complex.
Additionally, Canopy's AI-powered data insights enhance your alerting capabilities. For example, you can fine-tune thresholds based on factors like sales estimates and stock levels. This flexibility opens the door to building more sophisticated e-commerce solutions.
FAQs
How can I keep my API credentials secure when using the Canopy API for tracking Amazon price drops?
To protect your API credentials while working with the Canopy API, here are some essential tips:
- Avoid hard-coding credentials in your application code. Use environment variables or secure configuration files instead to keep them safe.
- Restrict access by implementing role-based permissions and creating credentials with only the necessary privileges.
- Regularly update your credentials to minimize the chances of unauthorized access.
- Keep an eye on API key activity and immediately disable any keys that show unusual or suspicious behavior.
These practices will help safeguard your credentials and maintain the security of your price monitoring system.
How can I effectively manage API rate limits to ensure uninterrupted price monitoring?
To keep your API usage within limits and ensure uninterrupted price monitoring, consider these practical approaches:
- Keep an eye on rate limits: Always adhere to the allowed API request thresholds to avoid being blocked or facing disruptions.
- Spread out your requests: Distribute your API calls over time rather than sending them all at once, which helps prevent traffic surges.
- Implement retry delays: If a request fails due to hitting the limit, use a system that retries after a brief pause to avoid overwhelming the API.
Following these steps will help maintain steady and reliable price tracking for your application.
How can I choose between REST and GraphQL endpoints for monitoring Amazon prices with the Canopy API?
The Canopy API offers both REST and GraphQL endpoints, giving you the flexibility to choose what works best for your project. If you're aiming for simplicity and a quick setup - especially for smaller applications or when dealing with predefined data structures - REST is a solid choice.
For more advanced needs, GraphQL shines by letting you request exactly the data you need, minimizing over-fetching and making it a great option for handling complex queries or larger datasets.
When selecting between the two, think about your application's specific demands: How complex are your queries? What’s the expected data volume? How easily can it integrate with your existing systems? Both options are built to integrate smoothly into your workflows, so it’s all about finding the right fit for your technical needs and project goals.