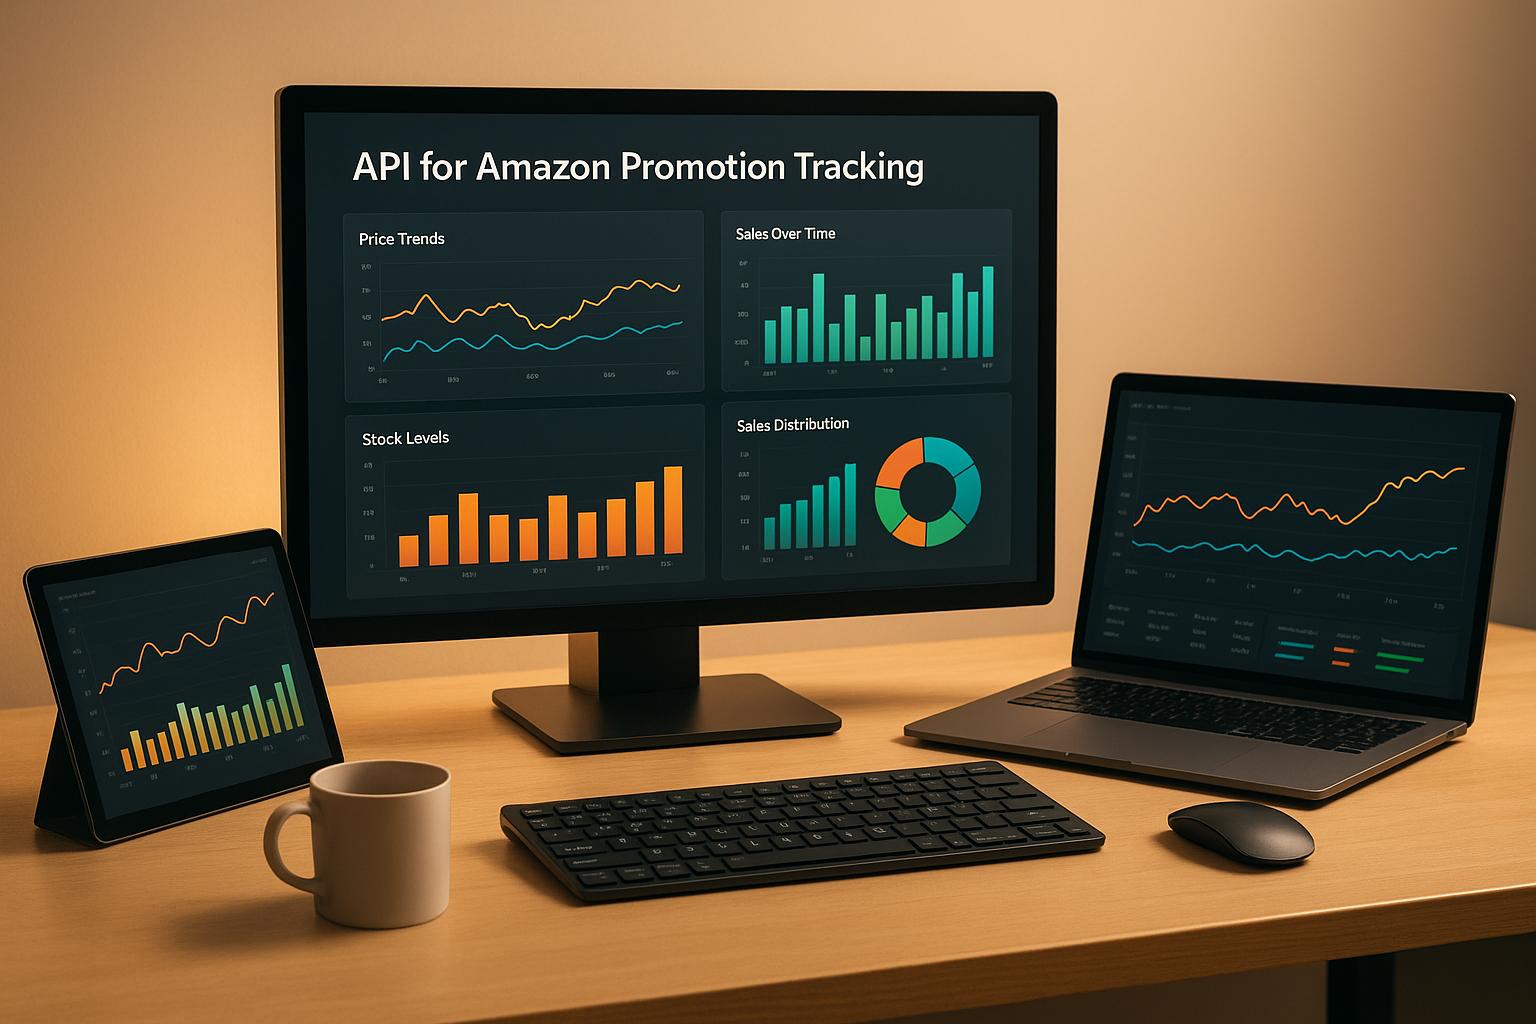
How to Use APIs for Amazon Promotion Tracking
Automate Amazon promotion tracking using REST or GraphQL APIs — monitor prices, stock, sales signals and set alerts for real-time insights.
How to Use APIs for Amazon Promotion Tracking
Running Amazon promotions can boost sales, but tracking performance manually is time-consuming and error-prone. APIs simplify this process by automating data collection, allowing you to monitor essential metrics like pricing, stock levels, sales, reviews, and search rankings in real-time. Here's what you need to know:
- What You Can Track: Key metrics include product prices, stock availability, sales figures, customer reviews, and search rankings.
- Why APIs Are Better: APIs save time by automating data collection, eliminating the need for manual checks or scrapers. They provide up-to-date, accurate data that integrates directly into your analytics tools.
- Getting Started: Register for API access (e.g., Canopy API), secure your API key, and choose a plan based on your needs - ranging from free to premium options.
- Integration Basics: Use REST or GraphQL APIs with programming languages like JavaScript (Node.js). Secure your API key using environment variables to protect sensitive information.
- Automation and Alerts: Automate data collection with tools like cron jobs and set up alerts for key thresholds, such as low stock or significant price drops.
Setting Up Your API Integration
Getting started with API integration involves securing your credentials and setting up your development environment. This step-by-step process ensures you can access real-time data to monitor Amazon promotions effectively.
Registering for API Access
To track Amazon promotions, you'll need an API that provides real-time product data, pricing details, and sales metrics. Start by registering at https://canopyapi.co. The registration process is quick, and once completed, you'll gain immediate access to the dashboard and integration tools.
Your API key, available on the dashboard, serves as your unique identifier for all API interactions. This key is essential for authenticating your requests and ensuring secure access to Amazon data.
Choose a plan that fits your needs:
- Hobby Plan: Free forever with 100 requests per month, ideal for small catalogs or testing.
- Pay As You Go Plan: Starts at $0 per month, includes 100 free requests, and charges $0.01 for each additional request. Discounts apply for higher volumes (10,000+ and 100,000+ requests).
- Premium Plan: Costs $400 per month and includes 100,000 requests, with additional requests priced at $0.004 each. This plan also includes premium phone support.
Canopy API supports both REST and GraphQL interfaces, so you can choose the one that best suits your technical setup. Once you've secured your credentials, you're ready to configure your development environment and start coding.
Setting Up Your Development Environment
With your API credentials in hand, it's time to set up your coding environment. Begin by selecting your preferred programming language and framework. JavaScript with Node.js is a popular choice for API integrations because of its asynchronous features and extensive library support. For Node.js, you can use libraries like axios or node-fetch for REST APIs, or graphql-request and apollo-client for GraphQL.
Here’s a simple example of a REST API call in Node.js:
const axios = require('axios');

const API_KEY = 'your_api_key_here';
const REST_ENDPOINT = 'https://rest.canopyapi.co/';

async function getProductData(asin) {
  try {
    const response = await axios.get(`${REST_ENDPOINT}product/${asin}`, {
      headers: {
        'Authorization': `Bearer ${API_KEY}`,
        'Content-Type': 'application/json'
      }
    });
    return response.data;
  } catch (error) {
    console.error('Error fetching product data:', error);
  }
}
For GraphQL, here’s an example integration:
const { GraphQLClient, gql } = require('graphql-request');

const API_KEY = 'your_api_key_here';
const GRAPHQL_ENDPOINT = 'https://graphql.canopyapi.co/';

const client = new GraphQLClient(GRAPHQL_ENDPOINT, {
  headers: {
    'Authorization': `Bearer ${API_KEY}`
  }
});

const query = gql`
  query GetProduct($asin: String!) {
    product(asin: $asin) {
      title
      brand
      mainImage
      totalRatings
      rating
      displayPrice
    }
  }
`;

async function getProductData(asin) {
  try {
    const data = await client.request(query, { asin });
    return data.product;
  } catch (error) {
    console.error('Error fetching product data:', error);
  }
}
Important: Never hardcode your API key in your source code. Instead, store it securely using environment variables. Create a .env file in your project root:
CANOPY_API_KEY=your_actual_api_key_here
REST_ENDPOINT=https://rest.canopyapi.co/
GRAPHQL_ENDPOINT=https://graphql.canopyapi.co/
Use the dotenv package to load these variables into your application:
require('dotenv').config();

const API_KEY = process.env.CANOPY_API_KEY;
const REST_ENDPOINT = process.env.REST_ENDPOINT;
Be sure to add .env to your .gitignore file to prevent sensitive credentials from being committed to version control.
Canopy API offers detailed documentation and open-source examples, making the integration process straightforward. These resources include examples for common use cases, so you can quickly get started without spending excessive time on authentication or data structure setup.
For instance, a developer in December 2025 could use Canopy API to fetch Amazon product data by constructing a GraphQL query. This query could retrieve details such as the product title, brand, main image URL, total ratings, rating, and display price for a specific ASIN like "B0D1XD1ZV3." By integrating this data into your tools, you can efficiently track Amazon promotions in real time.
Once you've successfully made your first API call and confirmed it works, you'll have a solid foundation for more advanced workflows, including enhanced authentication and detailed data extraction.
Authentication and Authorization
Securing your API connection is essential for reliably tracking Amazon promotions. The Canopy API simplifies this process by replacing the complexity of OAuth 2.0 with a single API key for secure and straightforward access. Let’s break down how to implement this and troubleshoot common authentication issues to maintain uninterrupted data access.
How to Implement API Key Authentication
The Canopy API streamlines authentication by using a single API key. To get started, sign up and retrieve your API key from the product dashboard. Once you have it, include the key as a Bearer token in your HTTP request headers for authentication.
Here’s how you can set up API key authentication for REST API calls:
const axios = require('axios');

const API_KEY = process.env.CANOPY_API_KEY;
const REST_ENDPOINT = 'https://rest.canopyapi.co/';

async function fetchPromotionData(asin) {
  try {
    const response = await axios.get(`${REST_ENDPOINT}product/${asin}`, {
      headers: {
        'Authorization': `Bearer ${API_KEY}`,
        'Content-Type': 'application/json'
      }
    });

    // Extract pricing and promotion details
    const { displayPrice, listPrice, savings } = response.data;
    return { displayPrice, listPrice, savings };
  } catch (error) {
    console.error('Authentication failed:', error.response?.status);
    throw error;
  }
}
For GraphQL requests, the setup is just as straightforward. Pass your API key in the headers like this:
const { GraphQLClient, gql } = require('graphql-request');

const API_KEY = process.env.CANOPY_API_KEY;
const GRAPHQL_ENDPOINT = 'https://graphql.canopyapi.co/';

const client = new GraphQLClient(GRAPHQL_ENDPOINT, {
  headers: {
    'Authorization': `Bearer ${API_KEY}`,
    'Content-Type': 'application/json'
  }
});
To protect your API key, always store it in environment variables and ensure your .env file is included in your .gitignore file. For production environments, use secret management tools like AWS Secrets Manager, Azure Key Vault, or Heroku Config Vars to securely store and manage your API keys.
Keep in mind that the Canopy API enforces rate limits based on your pricing plan:
- Hobby Plan: 100 requests per month.
- Pay As You Go Plan: 100 free requests, then $0.01 for each additional request.
- Premium Plan: 100,000 requests for $400 per month, with extra calls billed at $0.004 each.
To avoid hitting your limit, implement request tracking in your application:
let requestCount = 0;
const MAX_REQUESTS = 100; // Adjust based on your plan

async function trackPromotionWithLimit(asin) {
  if (requestCount >= MAX_REQUESTS) {
    console.warn('Monthly request limit reached');
    return null;
  }

  const data = await fetchPromotionData(asin);
  requestCount++;
  return data;
}
Troubleshooting Authentication Issues
Authentication issues often show up as HTTP status codes in the 400 or 500 range. Here’s how to handle the most common problems:
-
401 Unauthorized: This error means your API key is invalid or missing. Double-check that you’ve copied the key correctly from the Canopy API dashboard and formatted it as
Bearer YOUR_API_KEY. If the issue persists, regenerate your API key. - 403 Forbidden: This could indicate either a lack of permissions for the requested resource or that you’ve exceeded your rate limit. Check your plan and usage stats on the dashboard.
- Network Timeouts: If your requests are timing out, set a reasonable timeout value in your HTTP client configuration:
const axios = require('axios');

const client = axios.create({
  baseURL: 'https://rest.canopyapi.co/',
  timeout: 10000, // 10 seconds
  headers: {
    'Authorization': `Bearer ${process.env.CANOPY_API_KEY}`
  }
});

client.interceptors.response.use(
  response => response,
  error => {
    if (error.code === 'ECONNABORTED') {
      console.error('Request timeout - check network connection');
    }
    return Promise.reject(error);
  }
);
- SSL Certificate Issues: These might occur in development environments using self-signed certificates. While testing, you may need to bypass SSL verification temporarily, but avoid doing this in production.
- Error Logging: Detailed error logs are crucial for debugging. Capture HTTP status codes, error messages, and response headers to identify issues:
async function authenticatedRequest(endpoint) {
  try {
    const response = await axios.get(endpoint, {
      headers: {
        'Authorization': `Bearer ${process.env.CANOPY_API_KEY}`
      }
    });
    return response.data;
  } catch (error) {
    console.error('Authentication Error Details:', {
      status: error.response?.status,
      statusText: error.response?.statusText,
      data: error.response?.data,
      headers: error.response?.headers
    });
    throw error;
  }
}
Additionally, using connection pooling can optimize performance by reusing your HTTP client instance for multiple requests. This reduces the overhead of establishing new secure connections:
const axiosInstance = axios.create({
  baseURL: 'https://rest.canopyapi.co/',
  headers: {
    'Authorization': `Bearer ${process.env.CANOPY_API_KEY}`
  },
  maxRedirects: 5,
  timeout: 10000
});

async function getMultipleProducts(asins) {
  const promises = asins.map(asin =>
    axiosInstance.get(`/product/${asin}`)
  );
  return Promise.all(promises);
}
Fetching Amazon Promotion Data via APIs
This step connects secure API access with efficient data handling to enable continuous tracking of Amazon promotions. Once authentication is set up, you can utilize the Canopy API's REST and GraphQL endpoints to retrieve up-to-date product details, such as pricing, discounts, and savings, for ongoing promotions.
Constructing API Requests
Start by identifying the data you need and choosing the right endpoint. For tracking promotions, focus on endpoints that provide pricing details, list prices, and calculated savings.
The REST endpoint follows this structure: https://rest.canopyapi.co/product/{asin}, where {asin} represents the Amazon Standard Identification Number. Use a GET request to fetch product details:
const axios = require('axios');

const API_KEY = process.env.CANOPY_API_KEY;
const REST_ENDPOINT = 'https://rest.canopyapi.co/';

async function getPromotionDetails(asin) {
  try {
    const response = await axios.get(`${REST_ENDPOINT}product/${asin}`, {
      headers: {
        'Authorization': `Bearer ${API_KEY}`,
        'Content-Type': 'application/json'
      }
    });

    const product = response.data;

    // Check if the product has an active promotion
    const hasPromotion = product.savings && product.savings > 0;

    return {
      asin: product.asin,
      title: product.title,
      currentPrice: product.displayPrice,
      originalPrice: product.listPrice,
      savings: product.savings,
      savingsPercentage: product.listPrice
        ? ((product.savings / product.listPrice) * 100).toFixed(2)
        : 0,
      isOnSale: hasPromotion,
      timestamp: new Date().toISOString()
    };
  } catch (error) {
    console.error(`Failed to fetch promotion for ASIN ${asin}:`, error.message);
    throw error;
  }
}
For GraphQL requests, you can specify the exact fields required, minimizing bandwidth usage and speeding up responses:
const { GraphQLClient, gql } = require('graphql-request');

const API_KEY = process.env.CANOPY_API_KEY;
const GRAPHQL_ENDPOINT = 'https://graphql.canopyapi.co/';

const client = new GraphQLClient(GRAPHQL_ENDPOINT, {
  headers: {
    'Authorization': `Bearer ${API_KEY}`
  }
});

const PROMOTION_QUERY = gql`
  query GetProductPromotion($asin: String!) {
    product(asin: $asin) {
      asin
      title
      displayPrice
      listPrice
      savings
      currency
      availability
    }
  }
`;

async function fetchPromotionViaGraphQL(asin) {
  try {
    const data = await client.request(PROMOTION_QUERY, { asin });
    return data.product;
  } catch (error) {
    console.error('GraphQL query failed:', error);
    throw error;
  }
}
If you're tracking multiple products at once, batch your requests carefully to avoid exceeding rate limits:
async function trackMultiplePromotions(asins) {
  const promotionData = [];

  for (const asin of asins) {
    try {
      const promotion = await getPromotionDetails(asin);
      promotionData.push(promotion);

      // Add a 100ms delay to respect rate limits
      await new Promise(resolve => setTimeout(resolve, 100));
    } catch (error) {
      console.error(`Skipping ASIN ${asin} due to error`);
      continue;
    }
  }

  return promotionData;
}
Once you've gathered the data, the next step is to extract and refine it for actionable insights.
Parsing and Filtering Data
After receiving API responses, focus on isolating the key metrics for effective promotion tracking. The most critical fields are the current price (displayPrice), the original price (listPrice), and the discount amount (savings). A product is considered to be on promotion if the savings exceed zero and the display price is lower than the list price:
function parsePromotionData(productData) {
  const {
    asin,
    title,
    displayPrice,
    listPrice,
    savings,
    currency = 'USD'
  } = productData;

  // Calculate the discount percentage
  const discountPercentage =
    listPrice && savings ? ((savings / listPrice) * 100).toFixed(2) : 0;

  // Determine the promotion tier based on the discount percentage
  let promotionTier = 'none';
  if (discountPercentage >= 50) {
    promotionTier = 'deep_discount';
  } else if (discountPercentage >= 25) {
    promotionTier = 'major_sale';
  } else if (discountPercentage >= 10) {
    promotionTier = 'moderate_discount';
  } else if (discountPercentage > 0) {
    promotionTier = 'minor_discount';
  }

  return {
    asin,
    title,
    pricing: {
      current: `${displayPrice.toFixed(2)}`,
      original: `${listPrice.toFixed(2)}`,
      savings: `${savings.toFixed(2)}`,
      discountPercentage: `${discountPercentage}%`
    },
    promotionTier,
    isPromotionActive: savings > 0,
    timestamp: productData.timestamp
  };
}
You can also filter promotions based on date ranges to analyze performance over specific periods. Each data pull should include a timestamp for this purpose:
function filterPromotionsByDateRange(promotions, startDate, endDate) {
  const start = new Date(startDate).getTime();
  const end = new Date(endDate).getTime();

  return promotions.filter(promo => {
    const promoTime = new Date(promo.timestamp).getTime();
    return promoTime >= start && promoTime <= end;
  });
}

// Filter by promotion tier
function filterByPromotionTier(promotions, tier) {
  return promotions.filter(promo => promo.promotionTier === tier);
}

// Filter by minimum discount threshold
function filterByMinimumDiscount(promotions, minPercentage) {
  return promotions.filter(promo => {
    const discount = parseFloat(promo.pricing.discountPercentage);
    return discount >= minPercentage;
  });
}
By combining these filters, you can create detailed reports tailored to your needs:
async function generatePromotionReport(asins, filters = {}) {
  const { startDate, endDate, minDiscount = 0, promotionTier } = filters;

  // Fetch all promotion data
  let promotions = await trackMultiplePromotions(asins);

  // Parse and refine the data
  promotions = promotions.map(parsePromotionData);

  // Apply filters
  if (startDate && endDate) {
    promotions = filterPromotionsByDateRange(promotions, startDate, endDate);
  }
  if (minDiscount > 0) {
    promotions = filterByMinimumDiscount(promotions, minDiscount);
  }
  if (promotionTier) {
    promotions = filterByPromotionTier(promotions, promotionTier);
  }

  // Summarize key insights
  const summary = {
    totalProducts: promotions.length,
    activePromotions: promotions.filter(p => p.isPromotionActive).length,
    topDeals: promotions
      .sort(
        (a, b) =>
          parseFloat(b.pricing.discountPercentage) -
          parseFloat(a.pricing.discountPercentage)
      )
      .slice(0, 10)
  };

  return summary;
}
These parsing and filtering methods lay the groundwork for real-time promotion monitoring, ensuring you can track and analyze deals effectively as they happen.
sbb-itb-d082ab0
Real-Time Performance Monitoring with APIs
After setting up your data extraction process, the next step is keeping tabs on key metrics in real time. This approach transforms raw API data into actionable insights, allowing for timely adjustments to your strategies.
Key Metrics to Monitor
Focus on metrics that directly impact performance and provide clear feedback on the success of your promotions.
- Pricing dynamics: These are the backbone of promotion tracking. Keep an eye on the display price, list price, and savings amount for each product. Calculate the discount percentage in real time to spot when promotions start, end, or increase in intensity. Analyzing price history can also uncover trends like frequent sales, seasonal price shifts, or competitor pricing changes.
- Sales performance indicators: While direct sales data may not be available, metrics like a product's Best Sellers Rank (BSR) can act as a useful proxy. For example, a jump in rank from 50,000 to 5,000 suggests strong sales momentum.
- Customer engagement metrics: These reflect how appealing your promotion is to customers. Track the total number of ratings and the average rating score. During active promotions, a spike in new reviews often signals increased customer interest.
- Stock availability: This serves as an early warning system for potential stock issues. Phrases like "Only 3 left in stock" or "Currently unavailable" during promotions can indicate either high demand or inventory problems. Regular checks during promotions can help avoid lost sales due to stockouts.
- Search visibility: This affects how many potential customers see your promotion. Monitoring keyword rankings for promoted products ensures that increased sales velocity translates into better search performance.
Here’s a practical example of how to collect these metrics using a REST API:
async function collectPromotionMetrics(asin) {
  try {
    const response = await axios.get(
      `https://rest.canopyapi.co/product/${asin}`,
      {
        headers: {
          'Authorization': `Bearer ${process.env.CANOPY_API_KEY}`,
          'Content-Type': 'application/json'
        }
      }
    );

    const product = response.data;

    return {
      timestamp: new Date().toISOString(),
      asin: product.asin,
      pricing: {
        current: product.displayPrice,
        list: product.listPrice,
        savings: product.savings,
        discountPercent: product.listPrice
          ? ((product.savings / product.listPrice) * 100).toFixed(2)
          : 0,
        currency: product.currency || 'USD'
      },
      salesRank: {
        overall: product.salesRank?.overall || null,
        category: product.salesRank?.category || null,
        categoryName: product.salesRank?.categoryName || null
      },
      reviews: {
        totalCount: product.ratingsTotal || 0,
        averageRating: product.rating || 0,
        recentReviews: product.recentReviewCount || 0
      },
      stock: {
        available: product.availability?.available || false,
        status: product.availability?.status || 'unknown',
        quantity: product.availability?.quantity || null
      },
      promotion: {
        isActive: product.savings > 0,
        type: product.dealType || 'standard',
        badgeText: product.badge || null
      }
    };
  } catch (error) {
    console.error(`Metrics collection error for ${asin}:`, error.message);
    throw error;
  }
}
For tracking multiple products more efficiently, you can use GraphQL to fetch only the data you need:
const METRICS_QUERY = gql`
  query TrackPromotionMetrics($asins: [String!]!) {
    products(asins: $asins) {
      asin
      title
      displayPrice
      listPrice
      savings
      rating
      ratingsTotal
      salesRank {
        overall
        category
        categoryName
      }
      availability {
        available
        status
      }
    }
  }
`;

async function batchCollectMetrics(asins) {
  const client = new GraphQLClient('https://graphql.canopyapi.co/', {
    headers: {
      'Authorization': `Bearer ${process.env.CANOPY_API_KEY}`
    }
  });

  const data = await client.request(METRICS_QUERY, { asins });
  return data.products.map(product => ({
    timestamp: new Date().toISOString(),
    ...product
  }));
}
Automating Data Collection
Once your data collection and filtering are set up, automation ensures you never miss critical updates. Manual tracking often falls short, especially for changes occurring outside regular business hours. Automating the process guarantees consistent monitoring, capturing every price adjustment, stock update, and ranking change.
The frequency of data collection depends on the nature of your promotions. For high-stakes events like Lightning Deals or Prime Day, collecting data every 15 minutes is ideal. For standard promotions, hourly checks usually suffice, while daily snapshots are enough for tracking long-term trends.
Here’s an example of how to automate data collection using a cron job in Node.js:
const cron = require('node-cron');
const { MongoClient } = require('mongodb');

const mongoClient = new MongoClient(process.env.MONGODB_URI);
const db = mongoClient.db('promotion_tracking');
const metricsCollection = db.collection('metrics');

const TRACKED_ASINS = [
  'B08N5WRWNW',  // Example: Echo Dot
  'B09B8RXYX5',  // Example: Fire TV Stick
  'B0BSHF7WHW'   // Example: Kindle
];

cron.schedule('0 * * * *', async () => {
  console.log(`Starting metrics collection at ${new Date().toISOString()}`);

  try {
    const metrics = await batchCollectMetrics(TRACKED_ASINS);

    await metricsCollection.insertMany(metrics);

    for (const metric of metrics) {
      await checkForAlerts(metric);
    }

    console.log(`Collected metrics for ${metrics.length} products`);
  } catch (error) {
    console.error('Metrics collection error:', error);
    await notifyError(error);
  }
});

async function checkForAlerts(metric) {
  if (metric.pricing.discountPercent >= 40) {
    await sendAlert({
      type: 'DEEP_DISCOUNT',
      asin: metric.asin,
      discount: metric.pricing.discountPercent,
      message: `Product ${metric.asin} now at ${metric.pricing.discountPercent}% off`
    });
  }

  if (metric.stock.quantity && metric.stock.quantity <= 5) {
    await sendAlert({
      type: 'LOW_STOCK',
      asin: metric.asin,
      quantity: metric.stock.quantity,
      message: `Low stock warning: only ${metric.stock.quantity} units left`
    });
  }

  const previousMetric = await metricsCollection.findOne({ asin: metric.asin });
  if (
    previousMetric &&
    metric.salesRank &&
    previousMetric.salesRank &&
    metric.salesRank.overall &&
    previousMetric.salesRank.overall &&
    metric.salesRank.overall < previousMetric.salesRank.overall * 0.5
  ) {
    await sendAlert({
      type: 'SALES_RANK_IMPROVEMENT',
      asin: metric.asin,
      message: `Sales rank improved from ${previousMetric.salesRank.overall} to ${metric.salesRank.overall} for product ${metric.asin}`
    });
  }
}
Building Scalable Tracking Workflows
When you’ve automated your data collection, the next step is setting up workflows that can handle your growing needs. These workflows not only scale effortlessly with your business but also provide real-time alerts on performance metrics.
Integration with Analytics Platforms
Connecting your API data to analytics platforms is a game-changer for tracking trends and evaluating performance. Data warehouses like Amazon Redshift, Google BigQuery, or Snowflake are perfect for storing large volumes of time-series data and running complex queries.
Here’s an example of how you can use Node.js to push metrics into Google BigQuery:
const { BigQuery } = require('@google-cloud/bigquery');
const axios = require('axios');

const bigquery = new BigQuery({
  projectId: process.env.GCP_PROJECT_ID,
  keyFilename: process.env.GCP_KEY_FILE
});

const dataset = bigquery.dataset('amazon_promotions');
const table = dataset.table('product_metrics');

async function syncMetricsToWarehouse(asins) {
  const metrics = [];

  for (const asin of asins) {
    try {
      const response = await axios.get(
        `https://rest.canopyapi.co/product/${asin}`,
        {
          headers: {
            'Authorization': `Bearer ${process.env.CANOPY_API_KEY}`,
            'Content-Type': 'application/json'
          }
        }
      );

      const product = response.data;

      metrics.push({
        timestamp: new Date().toISOString(),
        asin: product.asin,
        title: product.title,
        current_price: product.displayPrice || 0,
        list_price: product.listPrice || 0,
        savings_amount: product.savings || 0,
        discount_percent: product.listPrice
          ? ((product.savings / product.listPrice) * 100)
          : 0,
        sales_rank: product.salesRank?.overall || null,
        rating: product.rating || 0,
        ratings_total: product.ratingsTotal || 0,
        is_available: product.availability?.available || false,
        stock_status: product.availability?.status || 'unknown'
      });
    } catch (error) {
      console.error(`Failed to fetch data for ${asin}:`, error.message);
    }
  }

  if (metrics.length > 0) {
    await table.insert(metrics);
    console.log(`Inserted ${metrics.length} records into BigQuery`);
  }

  return metrics;
}

setInterval(() => {
  syncMetricsToWarehouse(TRACKED_ASINS);
}, 3600000); // Run every hour
This script collects product data and pushes it to BigQuery, making it easy to connect with visualization tools like Tableau or Power BI for detailed analysis.
For more tailored data retrieval, GraphQL is a great option. It allows you to fetch only the fields you need for your dashboards:
const { GraphQLClient, gql } = require('graphql-request');

const ANALYTICS_QUERY = gql`
  query AnalyticsDashboard($asins: [String!]!) {
    products(asins: $asins) {
      asin
      title
      displayPrice
      listPrice
      savings
      rating
      ratingsTotal
      salesRank {
        overall
        category
      }
    }
  }
`;

async function fetchForDashboard(asins) {
  const client = new GraphQLClient('https://graphql.canopyapi.co/', {
    headers: {
      'Authorization': `Bearer ${process.env.CANOPY_API_KEY}`
    }
  });

  const data = await client.request(ANALYTICS_QUERY, { asins });

  return data.products.map(product => ({
    ...product,
    discountPercent: product.listPrice
      ? ((product.savings / product.listPrice) * 100).toFixed(2)
      : '0.00',
    timestamp: new Date().toISOString()
  }));
}
Using a dedicated API service like Canopy API simplifies the process. Instead of worrying about maintaining your own scraper, you can focus on building workflows and extracting actionable insights. As stated in their documentation:
Time is a precious resource, do not spend it maintaining your Amazon scraper, build your product!
With your data flowing seamlessly into your analytics tools, you’re ready to take the next step: monitoring performance in real-time.
Setting Alerts for Performance Thresholds
Automated alerts are essential for staying on top of critical changes. They help you respond quickly when metrics hit key thresholds, whether it’s a sudden price drop, low inventory, or a shift in sales rank.
An alert system can monitor multiple factors, including:
- Price changes: Get notified of unexpected price increases or discounts exceeding a set percentage.
- Inventory levels: Receive alerts when stock runs low during active promotions.
- Sales rank shifts: Detect significant improvements or declines in rankings.
- Rating trends: Spot drops in product ratings that could indicate customer dissatisfaction.
Here’s an example of how to implement an alert system using Node.js:
const nodemailer = require('nodemailer');
const twilio = require('twilio');
const axios = require('axios');

const emailTransporter = nodemailer.createTransport({
  service: 'gmail',
  auth: {
    user: process.env.EMAIL_USER,
    pass: process.env.EMAIL_PASSWORD
  }
});

const twilioClient = twilio(
  process.env.TWILIO_ACCOUNT_SID,
  process.env.TWILIO_AUTH_TOKEN
);

const ALERT_THRESHOLDS = {
  deepDiscount: 40,
  criticalStock: 5,
  salesRankImprovement: 0.5,
  ratingDrop: 0.5,
  priceIncrease: 10
};

async function monitorAndAlert(asin) {
  const response = await axios.get(
    `https://rest.canopyapi.co/product/${asin}`,
    {
      headers: {
        'Authorization': `Bearer ${process.env.CANOPY_API_KEY}`,
        'Content-Type': 'application/json'
      }
    }
  );

  const product = response.data;
  const alerts = [];

  const discountPercent = product.listPrice
    ? ((product.savings / product.listPrice) * 100)
    : 0;

  if (discountPercent >= ALERT_THRESHOLDS.deepDiscount) {
    alerts.push({
      severity: 'high',
      type: 'DEEP_DISCOUNT',
      message: `${product.title} (${asin}) now at ${discountPercent.toFixed(1)}% off - Current price: $${product.displayPrice.toFixed(2)}`,
      data: {
        asin,
        discount: discountPercent,
        currentPrice: product.displayPrice,
        listPrice: product.listPrice
      }
    });
  }

  const stockQuantity = product.availability?.quantity;
  if (stockQuantity && stockQuantity <= ALERT_THRESHOLDS.criticalStock) {
    alerts.push({
      severity: 'critical',
      type: 'LOW_STOCK',
      message: `Critical stock alert: ${product.title} (${asin}) has only ${stockQuantity} units remaining`,
      data: {
        asin,
        quantity: stockQuantity,
        status: product.availability.status
      }
    });
  }

  const previousData = await getPreviousMetric(asin);
  if (previousData) {
    if (
      product.rating &&
      previousData.rating &&
      (previousData.rating - product.rating) >= ALERT_THRESHOLDS.ratingDrop
    ) {
      alerts.push({
        severity: 'medium',
        type: 'RATING_DROP',
        message: `Rating dropped for ${product.title} (${asin}): ${previousData.rating} → ${product.rating}`,
        data: {
          asin,
          previousRating: previousData.rating,
          currentRating: product.rating
        }
      });
    }
  }

  if (alerts.length > 0) {
    const alertMessages = alerts.map(alert => alert.message).join('\n');
    await emailTransporter.sendMail({
      from: process.env.EMAIL_USER,
      to: process.env.ALERT_RECIPIENT_EMAIL,
      subject: `Alert: Issues detected for ASIN ${asin}`,
      text: alertMessages
    });
    console.log(`Alerts sent for ASIN ${asin}`);
  }
}
With automated alerts in place, you’ll be able to catch and respond to critical issues before they escalate, ensuring your promotions stay on track.
Conclusion
Final Thoughts
Using APIs for Amazon promotion tracking can completely transform how you manage and optimize your promotional strategies. In this guide, we’ve covered the essentials - from setting up API integrations and ensuring secure authentication to fetching real-time data and building scalable, automated workflows.
The standout benefit of API-based tracking is automation. Instead of manually monitoring prices, inventory, and sales ranks, APIs allow you to gather this data automatically and respond to changes instantly. This eliminates the hassle of maintaining web scrapers and frees up your team to focus on improving your products and fine-tuning your promotional efforts.
Time is a precious resource, do not spend it maintaining your Amazon scraper, build your product!
- Canopy API
API services are built to scale with your needs, offering pricing models that reward higher usage with volume discounts. The detailed data you can access - such as pricing trends, stock availability, customer ratings, and search rankings - provides actionable insights to help you understand your promotion performance, customer behavior, and competitive positioning.
With automated alerts and analytics integrations, you can proactively address issues and seize opportunities. Whether it’s a competitor lowering their prices, a stock shortage during peak demand, or a sudden rise in search rankings, APIs ensure you’re always informed and ready to act.
With these tools and insights in hand, you’re now equipped to begin implementing and refining your integration.
Next Steps
Now that you’ve got the basics of API-based promotion tracking down, it’s time to take action. Start by diving into Canopy API’s detailed documentation, which offers step-by-step guides for both REST and GraphQL implementations. The Hobby plan provides 100 free requests per month, giving you a no-risk opportunity to test the integration and see how it can enhance your workflow.
Our AI-powered APIs allow you to start fetching and processing Amazon data in minutes.
- Canopy API
Take advantage of the code examples in Canopy API’s resources. These examples cover a range of common use cases, from retrieving basic product data to setting up advanced multi-metric monitoring systems, and are available for various programming languages and frameworks.
Begin by focusing on a small set of high-priority ASINs to test and refine your workflows. As you grow more familiar with the API, you can expand your tracking system to cover your full product catalog, fine-tuning alert thresholds and processes along the way.
Canopy API is designed to grow with your business, offering volume discounts to keep your tracking solution cost-effective as your needs scale.
Ready to get started? Visit Canopy API today. Whether you choose the REST endpoint (https://rest.canopyapi.co/) or the GraphQL endpoint (https://graphql.canopyapi.co/), you’ll find the flexibility to implement a solution that fits your technical requirements perfectly.
FAQs
What are the main advantages of using APIs to track Amazon promotions instead of doing it manually?
Using APIs to monitor Amazon promotions comes with some clear advantages compared to doing it manually. For starters, APIs let you automate the process of gathering data, which not only saves time but also reduces the chances of mistakes that can happen when tasks are done by hand. Plus, they offer real-time access to accurate information, so you can stay on top of promotions, pricing changes, and product updates without any lag.
On top of that, APIs like Canopy API are built for scaling and easy integration, meaning you can track multiple products or campaigns all at once. This kind of efficiency and accuracy is hard to match with manual methods, making APIs a go-to tool for businesses looking to fine-tune their Amazon promotion strategies.
How do I keep my API key secure when using the Canopy API?
To keep your API key safe, never share it publicly or include it in client-side code. Instead, store it securely in server-side environments like environment variables or protected configuration files. If your key is ever exposed or compromised, act quickly - generate a new one right away through your Canopy API dashboard to block any unauthorized access.
How can I set up automated alerts for tracking Amazon promotions using APIs?
To set up automated alerts for tracking Amazon promotions through APIs, start by connecting to a dependable API that provides access to Amazon's data. Make sure you configure secure authentication, such as API keys or tokens, to establish a safe connection. Once you're connected, pinpoint the exact data you want to track - this could include price changes, promotion start dates, or stock levels.
After identifying your data points, use the API's tools to set up triggers or conditions that activate alerts when certain criteria are met. For instance, you could configure an alert for price drops below $50.00 or when a new promotion becomes available. Then, link these alerts to your preferred notification method - whether that's email, SMS, or a dashboard - so you’re updated instantly.
If you're working with Canopy API, its real-time data access and thorough documentation can help simplify the process, making it easier to tailor alerts to your specific goals.